Saturday, May 30, 2020
Lest we forget
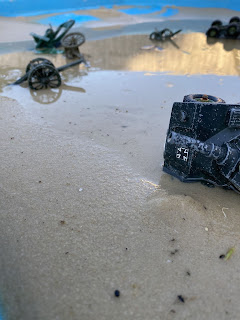
Tidying up the garden today and came across this scene from D Day. James had been blasting his sand tray with the hose and in the setting sun, Normandy images sprang to life. Either that or images of the First World War with the half buried artillery sticking out of the water.
Royalist Cavaliers
I thought I would take the opportunity to rebase some old figures I painted quite a while ago. After finding that four figures looked good on my Parliamentarians, I thought I had better do the same for the Royalists. This meant I had to beg and borrow odd figures to make up the numbers required, but a couple of quick paint jobs and we were up to strength.
Around ten years ago when I painted these guys, I had come up with the plan of sticking Essex figures on Foundry horses.They work quite well and the horses have a good energy to them, which is why I chose them over the stationary Essex mounts.
This officer above, with a quick sash repaint, helped to bulk up the numbers to make the unit.
The leader of the regiment was a purchase off eBay around ten years ago. I think it’s Prince Rupert from Redoubt miniatures. Now he and his standard bearer can finally lead from the front.
These four bases make up two squadrons in Victory without Quarter. This number of bases basically makes a Regiment, although you could still add another squadron to make a large Regiment.
The large 80mm x 80mm bases are taken from an idea in ‘Beneath the Lilly Banners’. They allow my ‘gallopers’ to actually look the part, being more spaced out and disorganised, you know... a bit cavalier. This contrasts with my ‘trotters’ who are on 60mm x 80mm bases, more compact and disciplined.
This was a quick little job but well worth it, now I have two Royalist squadrons for what feels like for free. Although the hard work was done many years ago, it’s kind of beyond memory.
Friday, May 22, 2020
Orcs
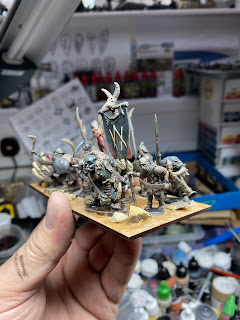
I was pleasantly surprised that I managed to create three bases from this lot. A couple of the bases I loaded with seven miniatures to make them look more horde like. After creating Dwarf shield wall bases with seven on, I thought it’s the least I could do.
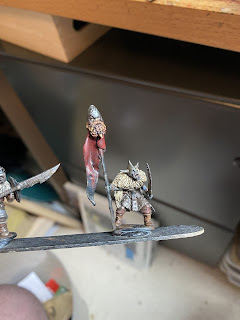
This large Black Uruk must be high ranking as he has two standards. I originally had him down as a large bodyguard figure, but in the end he ended up becoming a cheiftain of two tribes, not bad.
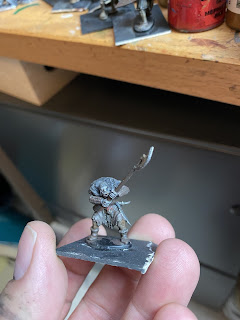
Even my sculpted figure ended up getting a small standard, I think he’s going up in the world.
The standard is meant to be Mount Gundabad with its three peaks. Hidden inside is the red eye...
Speed painting Orcs
Another batch of dirty orcs shuffle around waiting to be based. I made these guys up a few months ago from plastic kits. They are all kit bashed from several different box sets from as many different manufacturers. These were particularly fun to paint because on a lot of them I had sculpted green stuff helmets and cloaks/ furs.
The trick I use to crank through these evil creatures is to do basic dark colours then shade with a watered down wash of Woodland scenics ‘black’. I have also mixed this black with some WS brown to create my ‘magic mix’. This magic mix is great for slopping on all over the skin and clothes to create a dirty wash. Quick to do, but when all based together, the overall look is effective.
This is my brave attempt at doing some simple sculpting. If you’re going to have a go at sculpting... start with orcs, as it doesn’t really matter if the result is a bit rough and ready. Orc smiths aren’t known for their high standards. I had great fun with these later batches of orcs, creating crude helmets and trying to make them look a little more ‘orcy’. These should look good mixed into the other goblin rabble once based.
These orcs are meant to be very dark and dirty in appearance, so I don’t worry too much about detail on the clothes, they are to be viewed as a mass horde all merging into one. After washes of black and brown on weapons etc. I might go in with some flesh wash and touch on the weapons and armour, this is good for rust.
The magic paint which acts like a an ink when watered down. It can also be mixed with Umber brown to create a dirty wash.
Once the black wash is dry I may go over the colour again to highlight it... but not always, depends on the colour. I don’t want my orcs becoming too bright and like them looking dark and grotty.
Another line of orcs await the quick armour dry brush and their base colours.
Below, woodland scenics paint, these paints can be easily mixed together to form various washes. Not just browns but greens for armour, this I use for my Elves but it also looks good on orc armour too.
Sunday, May 17, 2020
Brush Bristle Pikes
I made another batch of pikes today from plastic brush bristles. I am a complete convert to this method after seeing it done on You Tube. It took me a while to find a good brush with the right diameter bristles, but a trip to a hardware mega store turned up trumps.
What I love about the look of the plastic pikes is the spear heads.These are the the ends of the bristles flattened with pliers, then cut to shape with scissors. You can even take the pliers a flatten a small length under the spear head too, this looks good as the brackets that run down the shaft of the pike. Another nice touch is the slight curve you get sometimes on the plastic bristles, this looks very realistic and mimics the way a long pike will sometimes look. Easy to make and the results are better than metal I think.
The length of the pikes I cut to 80mm, this was done by copying the metal shop bought ones.
The plastic also glues very well to metal so is super tough. Also, It might just save an eye or two when you drop your dice.
Saturday, May 16, 2020
History Lesson II. Gettysburg
The Army of Northern Virginia marches north and descends on the town of Gettysburg in search of shoes. The union cavalry head for the town to replace their worn out socks. When they meet over footwear the decisive battle of the war will be fought.
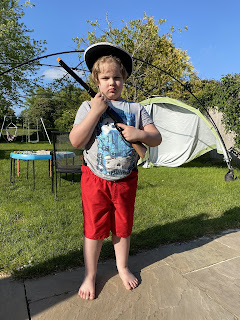
Confederate infantryman 1863. Grey coat with stolen union zouave trousers, cut short for comfort. Bare feet from lack of shoes and an old sheriff’s hat to protect against the July sun. A concealed brace of pistols, a Henry rifle and a mean attitude, will prove vital in the first two days of fighting.
Confederate infantryman 1863. Grey coat with stolen union zouave trousers, cut short for comfort. Bare feet from lack of shoes and an old sheriff’s hat to protect against the July sun. A concealed brace of pistols, a Henry rifle and a mean attitude, will prove vital in the first two days of fighting.


