Saturday, October 29, 2011

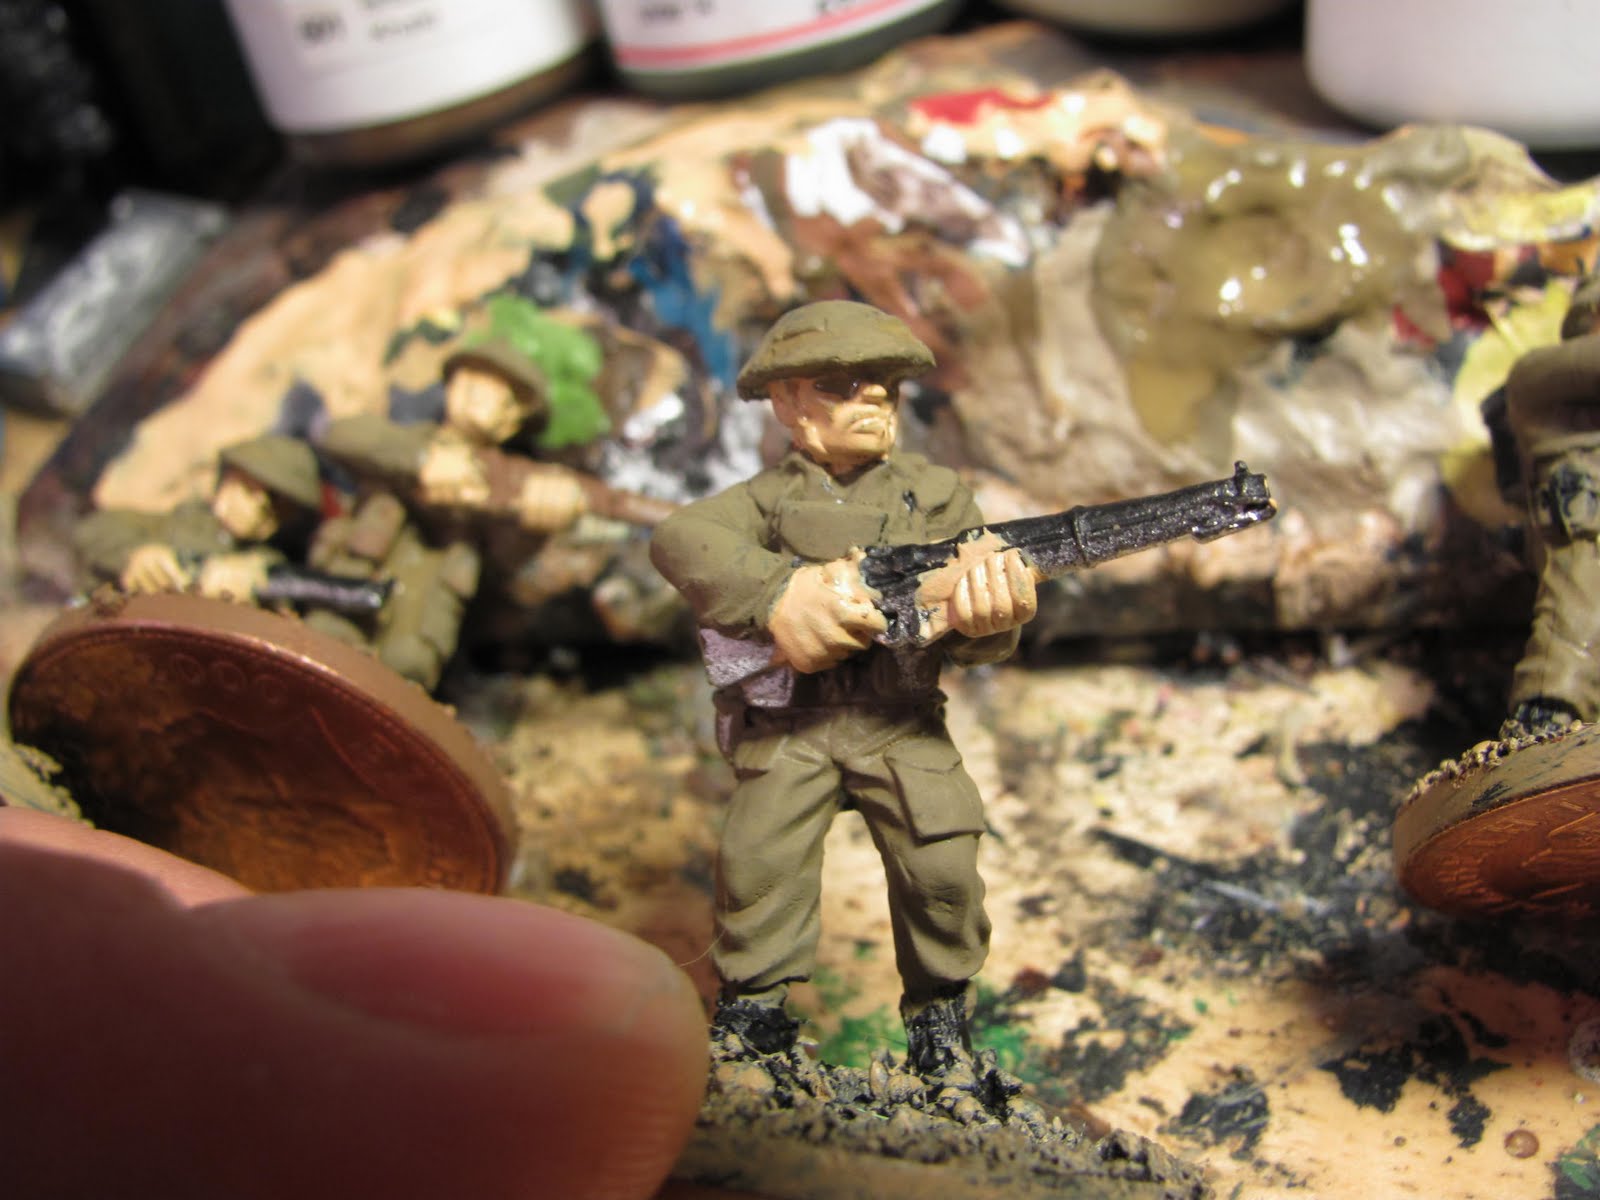
Speed Painting WWII Tommys.

I wasn't too worried about leaving black to act as shading here either, this I can do by using black Ink.

First the Tamiya Khaki paint was splashed on all over including the helmet cover.


These are the two colours I used to paint this unit.


Then I painted the flesh tone on. For speed I didn't worry about trying t leave any black for shading purposes.


Right lets get started quick like. First I sprayed the boys either black or brown. The brown was an experiment just to see if it made things any easier. Both methods worked as well.

The lost and found Legion

I found ( and repaired) this very old picture today, that I found at the bottom of a cupboard. It was drawn way back in 2001 to celebrate a Secundian victory over Alanican forces. Of course back then It was just a friendly game to test out some rules, It would be many years later that we started the campaign and things turned real.


This black shielded Legion would become the XXI RAPAX in later years, the red shields the II AUGUSTA.


A young Alanicus runs for his life as his battle line breaks up around him. That's torn It!


This will set a common tone in the Alanicus' battles to come. Nothing can stand the might of Secundian troops.

Monday, October 24, 2011

WWII Tommy

I have been racing through a batch of WWII Tommies by using brown Inks. They seem to be made for the job of shading Khaki and all the other gear looks great with a good wash of brown. I'm very happy because this last batch took half the time but look just as good in my opinion.

It's made me start thinking about my American forces and how easy it would be to paint up a Platoon with the Ink wash method.

Painting again.

I actually found some time to paint this weekend and blitz through some WWII Tommies. I'll post up the results shortly.

Thursday, October 13, 2011

Celtic Shields.

I have had Celtic cavalry riding around my painting table for about three months now...It's time to finish them off.

I drew these ages ago to help with their shield design. The stag I used for
some of the Infantry War bands and I wanted these horsemen to reflect the mounted element of the same tribe. So a white stag running on a green field was choosen to combine the images of strength and speed, things that the Celtic warrior would have wanted to portray in battle.

Wednesday, October 12, 2011

Dacian Dawn Raid.

The dreaded falx, the most feared Dacian weapon.


"Wake up it's time to die!"

Tuesday, October 11, 2011

Union Regiment, 1st Corps,1863

Lou takes a rest in the long grass.

A sergeant-Major steadies the line. He was a late edition and I tried the method of leaving the black undercoat around his eyes and mouth. I like the effect and will use it on the other regiments.


Here is the top view of the regiment (minus command) showing the variety in bases. Most have four figures on but the odd one or two have five to add character.


Finished Fed's

When i was collecting my ACW armies back in the nineties, there was much less to choose from figure wise as there is now. Funny enough these handsome Renegade models were just coming out but proved too expensive to buy at the time. Now due to the Metal/Plastic war going on, their range has become some of the best value metals around.
Although I have seen their prices start to climb again recently as I knew they would. I bought these when their unit deals were very good and saved quite a bit of money. Although to get the variety I wanted I found myself buying some of their single packs.


Renegade are on the large end of the figure scale with that of Redoubt and as a result, don't really mix well with other ranges. This said a few Foundry wounded figures seem to fit in ok, for the next unit I have ordered Redoubt ones.


I have included figures that could act as another command base, just in case the unit has to be split in another game system.

I'm also toying with the idea of placing the two Union flags on different bases for the same reasons, so each base can act as a command. I have noticed in some rule systems a unit can be made up of as little as four bases.

The Flocking Federals

The partly sanded bases are now flocked. Bushes, leaves and small grass clumps are added to finish the effect.

THUNK!


"Stand your ground men!"

Basing Iron Mitten style

I have never been one to spend hours on my bases as I prefer to get on with the figures themselves. Saying that though, I have been influenced over the years by what I see on other peoples Blogs. My bases are a mix really of both speed and detail.

I like the look of sand and grit of American bases as it sums up the atmosphere nicely of the Americas. However, I don't want to spend all day sticking and painting.
The happy medium for me is to just stick small areas around the base with sand then flock the rest with static grass. The effect is the same as covering the whole base with sand and then flocking but in a fraction of the time. Clumps of grass and small bushes finish off the base and bring it up to collectors standard very quickly.

Job done on to the next...

A partly sanded base, this will be painted and dry brushed to add detail. The rest of the base will be flocked with static grass. This way a big unit can be completed very quickly and still look good.


Colour guide for Federal Infantry

As mentioned earlier, I want these units look good but be turned around very quickly. Up close they don't look too good but stand up well from a distance.

The uniform is Foundry's 'French Blue' A, highlighted with 'French Blue' B.

The belts and forage bag are the black undercoat.

The trousers are Foundry's 'Sky Blue' A and B with the odd variant.

Muskets are Foundry's 'musket brown' B and ink washed with brown ink.

Although I painted the highlights on the dark blue tunic the trousers I just washed with brown Ink. This wash was used on just about everything including the blue canteens and musket.

The faces and hands were painted with Foundry 'Flesh B' then given a brown wash with Citadel Inks. Very straight forward and very quick and easy.

The flags are from GMB. I like my flags to be quite dirty and hole ridden but haven't got the heart to butcher these new ones. I might make the exception when the novelty wears off.


New bases and a nice new tight formation. Very firing line. I have tried to give the impression of the chaos of battle by making some of the bases irregular. This is done by adding the odd man and varying the number of figures on a base. Also wounded characters add to the atmosphere of the firing line in action.


A few little touches like giving the odd man stubble really helps bring the figures to life. I just need to remember to do this before I do the Ink washes next time. lots of dry brushed mud up the trousers helps with the campaign look.

Rebasing the Union

The old and the new. 40mm bases replace the larger 60mm ones.


" Where's everyone going Lou?"


I first based the unit on large 60x40mm bases as I hoped to get my character into each one. However, I soon realised that these big bases would complicate things slightly of the games board and a firing line would be huge. After much debate I made the hard but right decision to rebase them onto smaller 40x40mm bases. These are easier to arrange in formations and I prefer the tightly packed ranks more. It's worth ironing out all these annoying problems at the beginning so the rest of the army is a breeze.


"look sharp boys the eyes of your General are upon you today!"

Yanky Doodle went to town riding on a donkey.

Figures from Renegade.


Rough and ready Federal troops line up ready to embark on their movement bases. I want to get through quite a few of these, so I'm experimenting with quick, time saving ways of painting them.


This whole unit (32 I think) were painted all at the same time, I haven't done this for many years, but the nature of the simple uniform lends itself to it nicely.


I also made it more interesting for myself by trying out some new painting techniques. It's an old method but one I've never really used, undercoating in black and leaving enough showing to act as a shade colour. Leaving black around eyes and cuffs and collars etc is something I have read a lot about but never tried. I used to just block colour on and then shade with black ink washes.


Well I tried it and quite enjoyed it. I actually took tips from the Foundry paint guide which was interesting. Of course I cut corners to speed things up and used brown Ink washes on the trousers etc. I'll go through colours used later


I want my regiments to be quite large, so I'm painting them in units of 27 to 32 men, with a few wounded scattered around. I want the bases to be quite characterful like little dioramas.


Naps at Colours 2011.

Life Guards charge home.


The glory of the Napoleonic age is brought to life in this huge 28mm game. Very inspiring stuff.


15mm ACW (Colours 2011)

Great, I can see my favourites...the 14th NY Volunteers with their flashy red trousers.


I started off with 15mm ACW many years ago at the age of 15. So seeing this game really brought back some old memories (although my games never looked this good back then).


I do prefer the added detail you get with 28mm these days but these big divisional battles do look good.