Tuesday, September 08, 2015

Elven Standards

 Here is another Elven standard to go on the command base.
 WIP standard, I thought it best to paint something twirly on it rather than leave it plain green.
 I like the idea of long Elf standards and this new one is very long, I think it works and should look good fluttering over the heads of the rank and file. This double 'flagger' marks the army command base and should be easy to spot, although the commander himself is yet to be painted.


 Working out the new Elf shield was a challenge, but I decided to go for an all silver shield taken from the 'lay of Gilgalad'.
Sad I know but I sing this to my little boy each night, it's the only song which makes him fall straight to sleep. I sang him 'seek for the sword that was broken' the other night and It woke him up again. Stick to Elven songs for lullaby's you know it makes sense.
The last of the banner bearers, soon they will be gone to return no more.

Bolg Of the North

 WIP of Bolg here with his black maw. For his base I have dug out some large orcs from Black Tree design to act as his bodyguards.

A giant mountain Troll.

Orc Command Base

 Here we see a follow on from the Goblin base, only this time the stone from the garden is a lot bigger. I have taken to keeping an eye out for any weird and wonderful stones on my travels with basing in mind. This one was a case in point, I saw the sharp point and thought it would make a great overhanging rock for a figure.

 Do you want a hand with that shield?
 The join was covered using 'Greenstuff' again which i sculpted using another stone to imprint the putty and make stone marks. I will also add grass and tufts to help blend the two together. It took a bit of time but as he is my new Bolg figure and it should all be worth it.
You can really see the sponge weathering on his axe, I will defiantly be using the technique again. It's made for orcs and their equipment...very orcy.

Goblin Command Base

 I found this hairy orc figure on eBay along with his loyal hammer man and thought they would be great for a command base. The Orc is too small to really make it in the Orc circles so he has tried his luck in the mines and It's worked out for him. Behind him are an assortment of large Goblin spear men to help back him up.
 I tried placing him on a stone from the garden and smoothed over the join with 'greenstuff'. The stone was painted with Foundry grey and washed with a green wash.

 I really like these two because they look like they have a story behind them. Covered in hair they make odd looking Orcs and I like the idea that he was shunned as an outsider, now he's back with murder on his mind and he has some backup too which makes him very dangerous indeed.

Goblin backup

Monday, September 07, 2015

Making Goblin Shields

 The Goblin horde is almost finished and ready for basing.
 I couldn't find any suitable shields for my Goblins on line so decided to make some. I took a leaf out of BigRedBat's book and tried modelling with some coffee stirrers. The result was very 'Goblin' and good fun to make. I also used blobs of Superglue to make nails in the planking. These should dry brush up well.


Trolls and Arrows...

 This Mountain troll from Reaper miniatures is a good match for the GW Lotr troll, for all those out there collecting such armies. It will be nice to add a little variety to the lumbering big folk.
 Here is my finished arrow test using paperclips dabbed with Superglue. I think It works okay and looks fine from a distance. It will also come in handy when I start to model my Dwarven shield wall and Arthurian troops.
 "Bloody handed Elves..."

Painting rusty Orc armour

 I saw this trick while watching some other painters on You tube and thought it would be perfect for these Orcs. it is very simple to do and the results are great.
 When the armour has been dry brushed and washed with a red brown, simply dab on some 'metal' coloured paint with a sponge. Like dry brushing make sure the sponge is not over loaded with paint and the effect is great for rusting metal. I might try the same technique for adding mud etc.

 I had never tried this before and was pleased with the results, you're never too old to learn new tricks and watching You Tube for tips has become a pass time for me.

The Goblin Horde

 here are some progress shots of the Goblins. These will be classed as Moria Goblins or 'Northerners' as they were known to the other Orcs. They are a mix of many makes and should look quite a rabble when finished. The Reaper Goblins helped swell the numbers of lead Goblins from eBay.
 Here is a test figure of the giant reaper Orcs. One negative thing i have noticed about these plastic figures is that they tend to go tacky are painting, almost as if they are sweating. I took the time to wash the others in soapy warm water, but the results are still the same.
More Goblins and small Orcs come out of the mountains to join the fight.

Reaper Bones Orcs


 After the fun messing around with the smaller Goblins, these large Orcs were a must. I had the idea early on that they would be Orc Beserkers because of their size and fighting positions. After a little working out, I came up with the idea of mounting two of them to a base, all my 60x60mm Lotr bases will have four attacks and six wounds. These giant maniacs are no exception.
 I saw this figure a while ago and thought he would make a great Bolg, finding him in plastic was a lucky find and didn't break the bank. He is a good size and stands in a great leader position, crying out to be mounted on a rock shouting to his men.
Elrond doesn't look happy.

To give the impression of being a Beserker I riddled some of them in arrows. I took this idea from the Lotr films and figures. The arrows were made from paper clips with blobs of Superglue added to the ends to act as flights. Once painted, hopefully they should look like arrows.
 They should make a great shield breaker unit and have that unstoppable look to them. Like the Reaper Goblins, I cut and swapped hands and weapons around to make variants within the unit.

These guys don't  care about armour and it shows. Painting their armour was good fun and gave me a chance to try something new... a sponge

Reaper Bones Review

The red eye of Sauron sees all...


 Although I haven't found time to blog over the last few months, I have found time to paint 'thank the maker'. So tonight I will rush through about three months worth of progress and share some things learnt on my merry jounery.

Firstly, I have been messing around with Reaper Bones mini's, I saw some on eBay and thought I would give them a whirl. The mini's didn't look great and their light weight and bendy nature at first put me off.

However, the true strength of these figures are their cheap price, It's the difference between getting six goblins or getting twelve. Of course you usually need buckets of the critters so a good sculpt for half the price isn't bad.


 They also mix in quite well with other makes and once painted and based, you can't tell they are not lead.

The real advantage of Reaper Bones figures did not hit me until I had started painting them, they bend easily and can be twisted into different positions. Also with a sharp knife you can swap limbs to make your own designs. Add all this with a box of plastic orc bits and the sky is the limit. I used some spare heads from War games Factory Orcs to make some variety in the group. All this was great fun and very addictive.


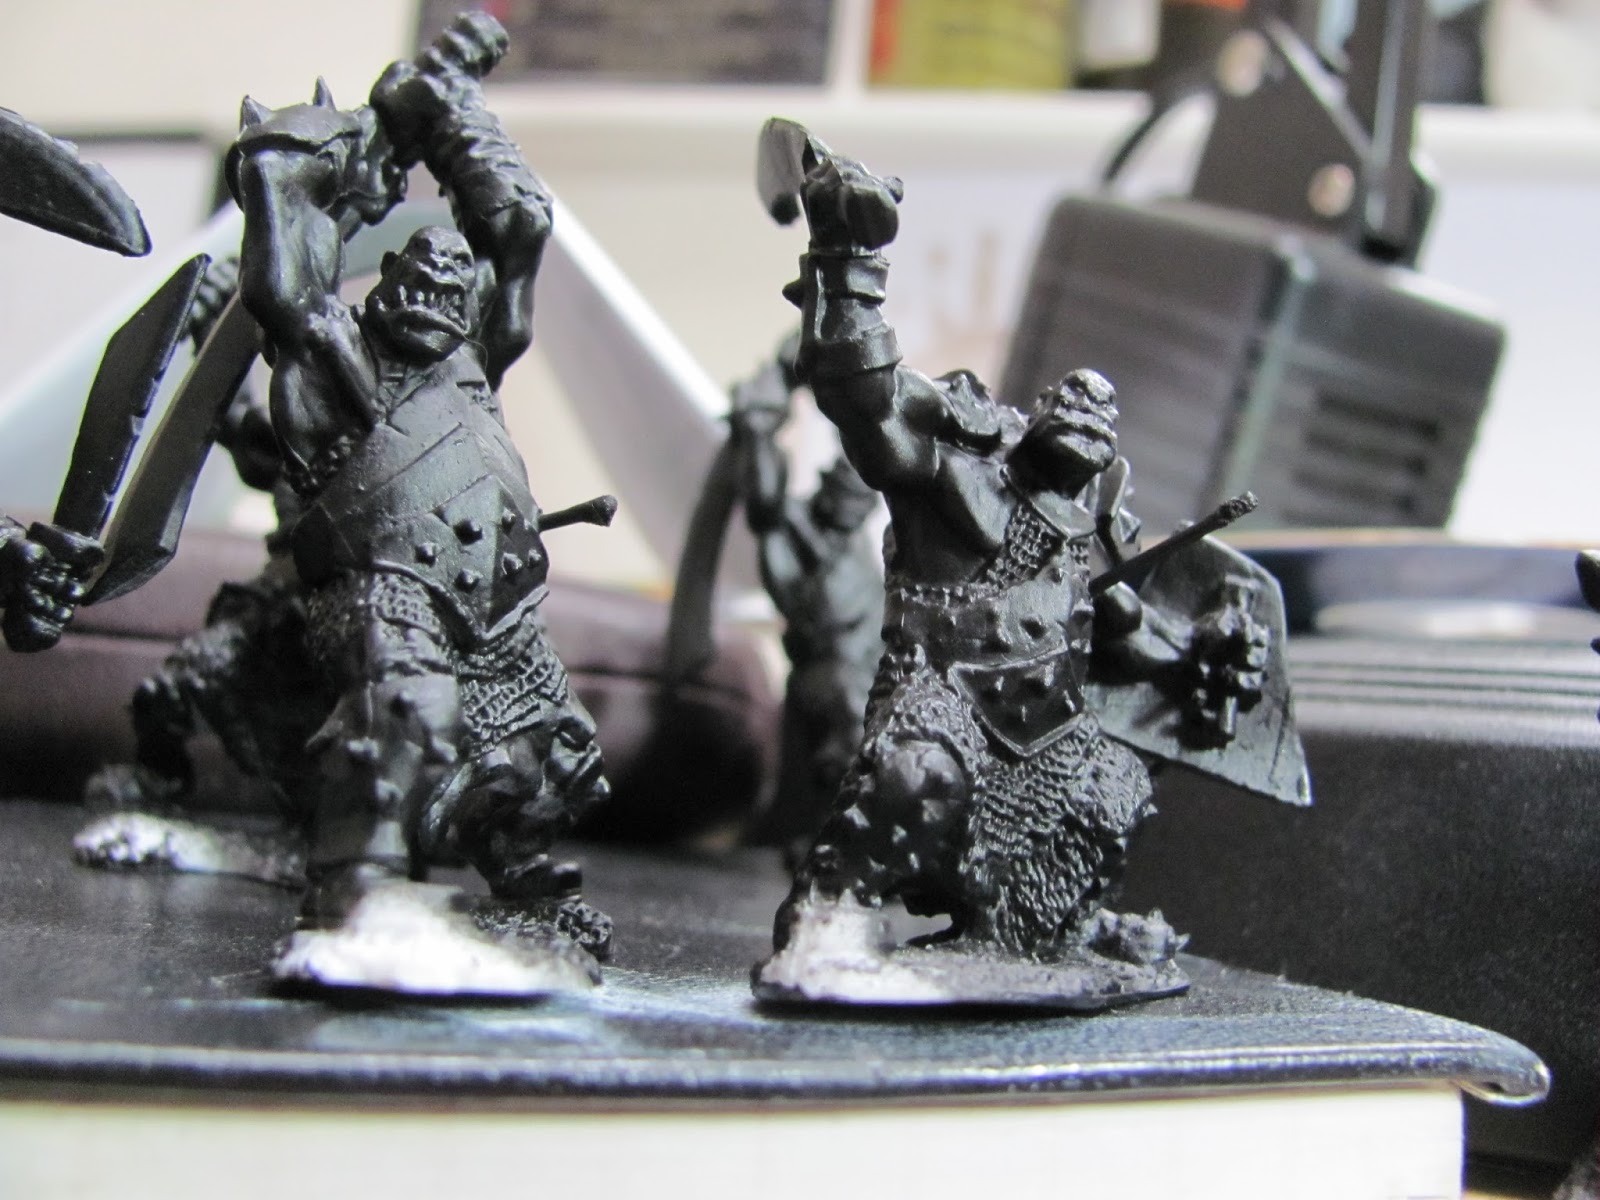
A week later I came across some larger Orcs at Campaign in Milton Keynes. These figures in metal were out of my price range before, but these Polymer figures were £2 a pack. I managed to get enough for a troop of berserkers.

Sunday, April 05, 2015

Saturday, April 04, 2015

Painting LOTR Trolls

 As well as dabbling with my Elven folk today I got the chance to do a bit more on one of these great troll figures. Unlike the GW sculpts, this troll is large enough to show the actual 'rhino' like skin cracks. This should be fun because It's one of the features of these beasts but very hard to do with the GW range.
 I started by painting the troll in a light sandy colour, this will form the base for the thick hide. After this I wet brushed on layers of darker paint being careful not to get any in the cracks of the hide.
 Above is a more up to date scale guide to the LOTR trolls I have been talking about. Only the one in the middle is an actual war gaming piece, the others are collectors items. However, they still make great gaming pieces in their own right.
 After I had played around with the darker shades I started to focus on the difference between the light coloured chest and belly and the thick hide of the back. This model is so detailed that I decided to give the back a light dry brush to pick out the details of the skin. The armour is yet to be done. Also this model has brilliant eyes, must better than I could paint, so I made sure to leave them alone and Is the reason I didn't undercoat the model.


 Elrond chances his luck against a giant mountain troll, I just don't know where you would start do you?

Fill It full of arrows from a distance I hear you cry.

 Another scale shot showing the GW battle troll and the larger Eaglemoss lead chess piece. It's a great model well worth tracking down on eBay.