Friday, July 11, 2014

German Tanks

 Here are two German tanks, years ago I did a post about putting the sea moss on them, now I'm going to go one stage further and flock them too. Originally I had used mixed herbs to flock the Sea moss but I think the new green flock looks better.


 A before and after shot, showing the added flock.


Improved with Flock

 An old stone wall is now overgrown with a dirt path running behind it. One of my greatest flocking discoveries of latter years is earth coloured flock. It's a must, get some!
 A pond is improved with some undergrowth and water plants.

 Some old wire hedges spring into life with some Woodland scenic flock.
 I used about three different colours to create highlights in the flock. Yellow being the lightest.
 The walls behind are improved with overgrowth.
 A very blocky bridge is improved with a bit of climbing foliage.


Flocking Crazy

 The whole of my scenery box was emptied out and attacked with flock of one sort or another. This included grass tufts which are still quite new to me and a lot of my old stuff hadn't seen them before.
 Hedges from eBay were improved with layers of clumpy flock.
 Fields from eBay were improved with sea moss and grass flocks of different colours.
 WWII pill boxes were covered in earth coloured flock as well as grass, this made them look a lot better.


Even my old stone wall that I made in 1998 was dug out and flocked up.

Flocking mad!

 in my time away from the computer I have been on a flocking rampage! After buying a few scenery pieces of eBay, I decided to improve them slightly by adding my own touches. So I got out my vast bag of flock and got to work adding different colours etc. While I had it all out I thought I might as well do all the other stuff in my scenery boxes that need up dating.

This turned into a week long flocking session which saw everything from fields to tanks getting covered in the stuff. I still haven't finished as I want to retouch the bases of my WWII lot before I put the flock away.

 I bought a couple of fields of eBay along with hedges and fences. These will come in useful for ECW and WWII games.

Finished Troll

 I was very pleased to find the GW LOTR Trolls were huge and fitted in very well with my growing Orc army.


Mordor Troll

 Well here is the up date on my Mordor trolls. Having collected a few old Citadel trolls for use with my Mordor army, I found I couldn't really find what I wanted. I kept trying to find something that looked like the attack trolls from the LOTR movies. After a little research I realised the GW figures were plenty big enough to use with my old Citadel collection and so I picked up a couple off eBay. They are actually much bigger than I hoped and look great wading through the masses of Orcs and other nasties.
 I painted them in the same way as I painted the Orcs, using washes and dry brushing. The armour was given it's wash of Tamiya Red Brown, then the edges were dry brushed again with silver.

 The skin was given a two tone approach which I later dappled with a lighter shade to give it a slightly mottled look.
Time to bring out the heavies!

Mordor Army


 I have really enjoyed this latest project and even dropped others to go back to it. It's very rewarding painting up all my anceint old figures that I bought as a 15yr old. Many of them I can remember where and when I bought them. I have also enjoyed finding other ranges and makes to mix in with the old Citadel ranges. I have ordered some Mantic Orc to see how they look, but they have been delayed for weeks now.
 As I said earlier, I have a lot of basing to do...

Shading the Orc Massive

 Here we can see the effect of the Woodland Scenic Black on the blocked in colours. It is great for showing up detail and darkens everything down, great for dirty Orcs and their masters.
 It allows me to just paint one base colour and then move on, once I have shaded it with the black, it's finished on to the next figure. Great for painting hordes.
 This batch of Gobliniods was very kindly given to me by my good friend Simon of BigRedBat fame. Thanks again Simon, they are painted and are already in service at the Black Gates.
 Here we see some finished figures waiting to be based. I have amassed quite a few bases now and the thought of basing them all is getting quite daunting. I enjoy painting too much and so get a little carried away. I can't really call them finished until the bases are done though...sigh.
My army of Mordor incorporates anything Orcish, Sauron isn't too fussy.
 These figures illustrate what I was saying earlier. I have bashed through shading the metal and clothes with the Woodland Scenics Black, but when It comes to the skin, I have spent a little longer and layered up some shades. Also the Tamiya Red Brown can be see on the axe and sword, great for rust!

Painting the Horde

 It's been a fair few months now since I had time to sit down and write anything, however, I have found time to do the odd bit of painting. Here is a quick run down of my Orc painting process and tips I have picked up along the way.

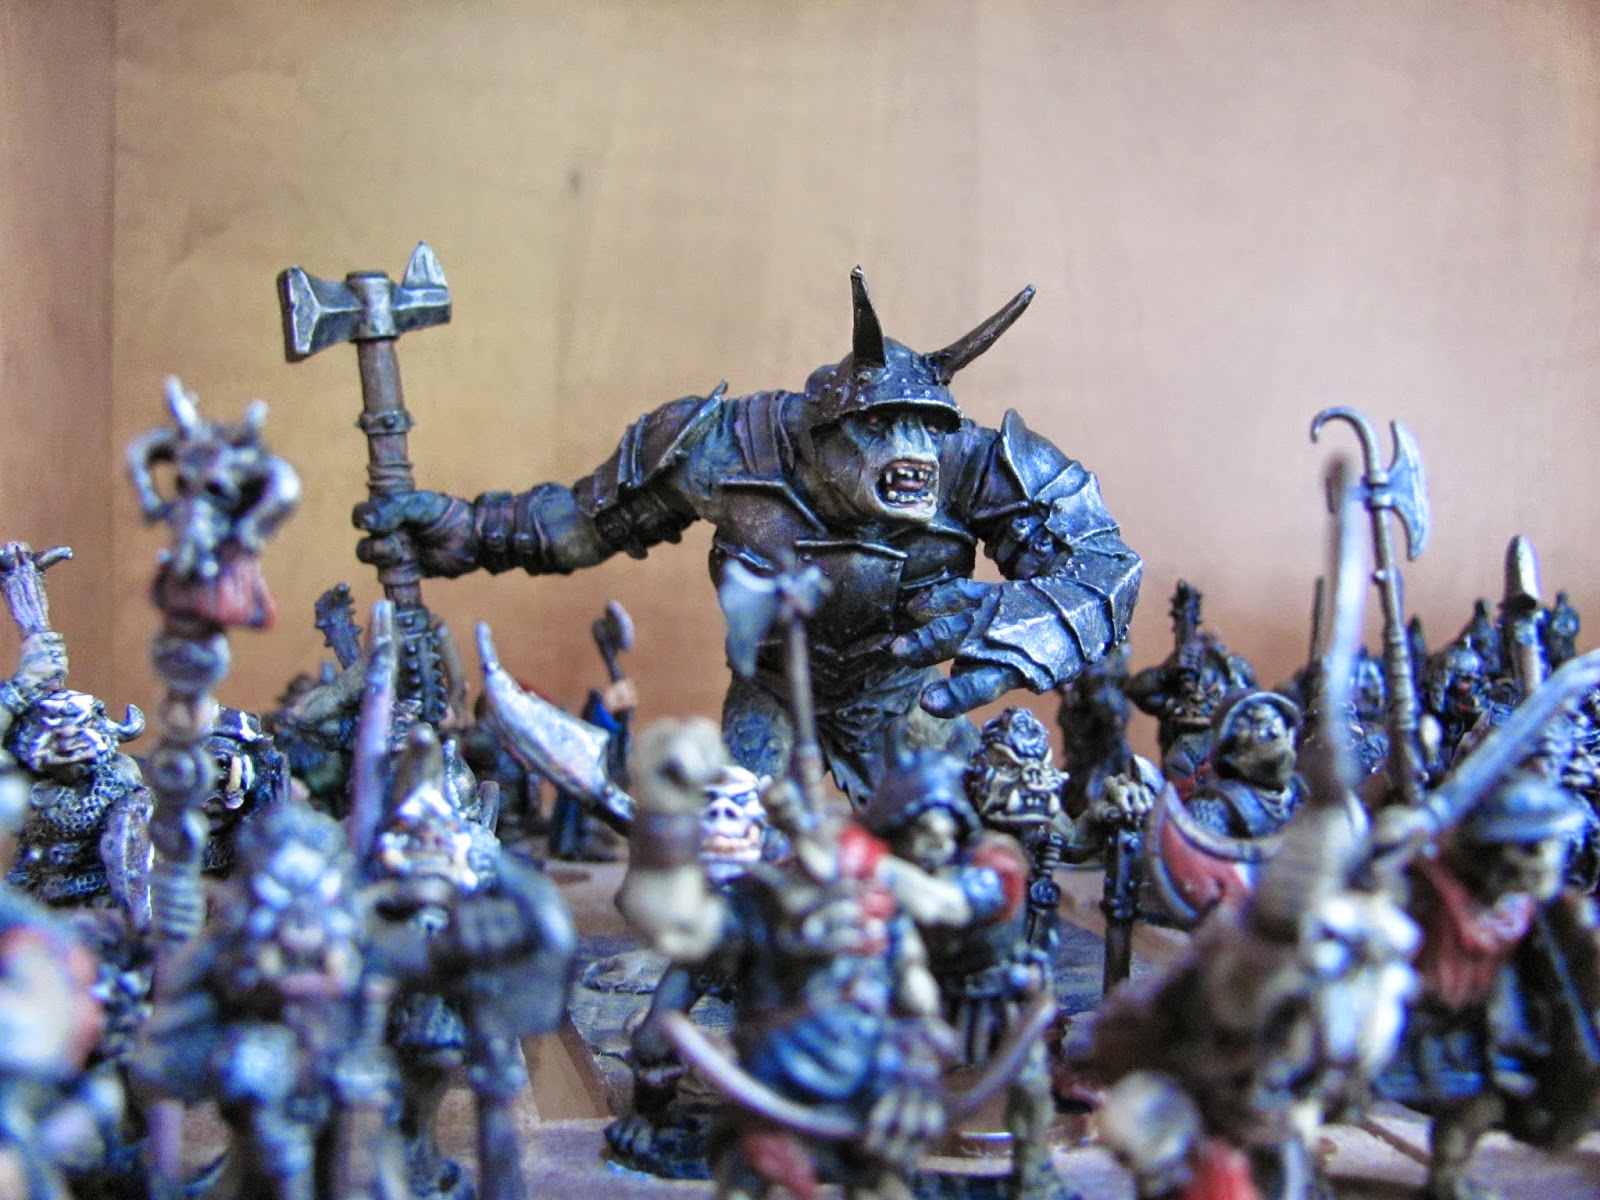
Now my approach to painting Orcs is a quick one as you need shed loads of them for an army, so I try to paint them quickly using washes and dark colours.

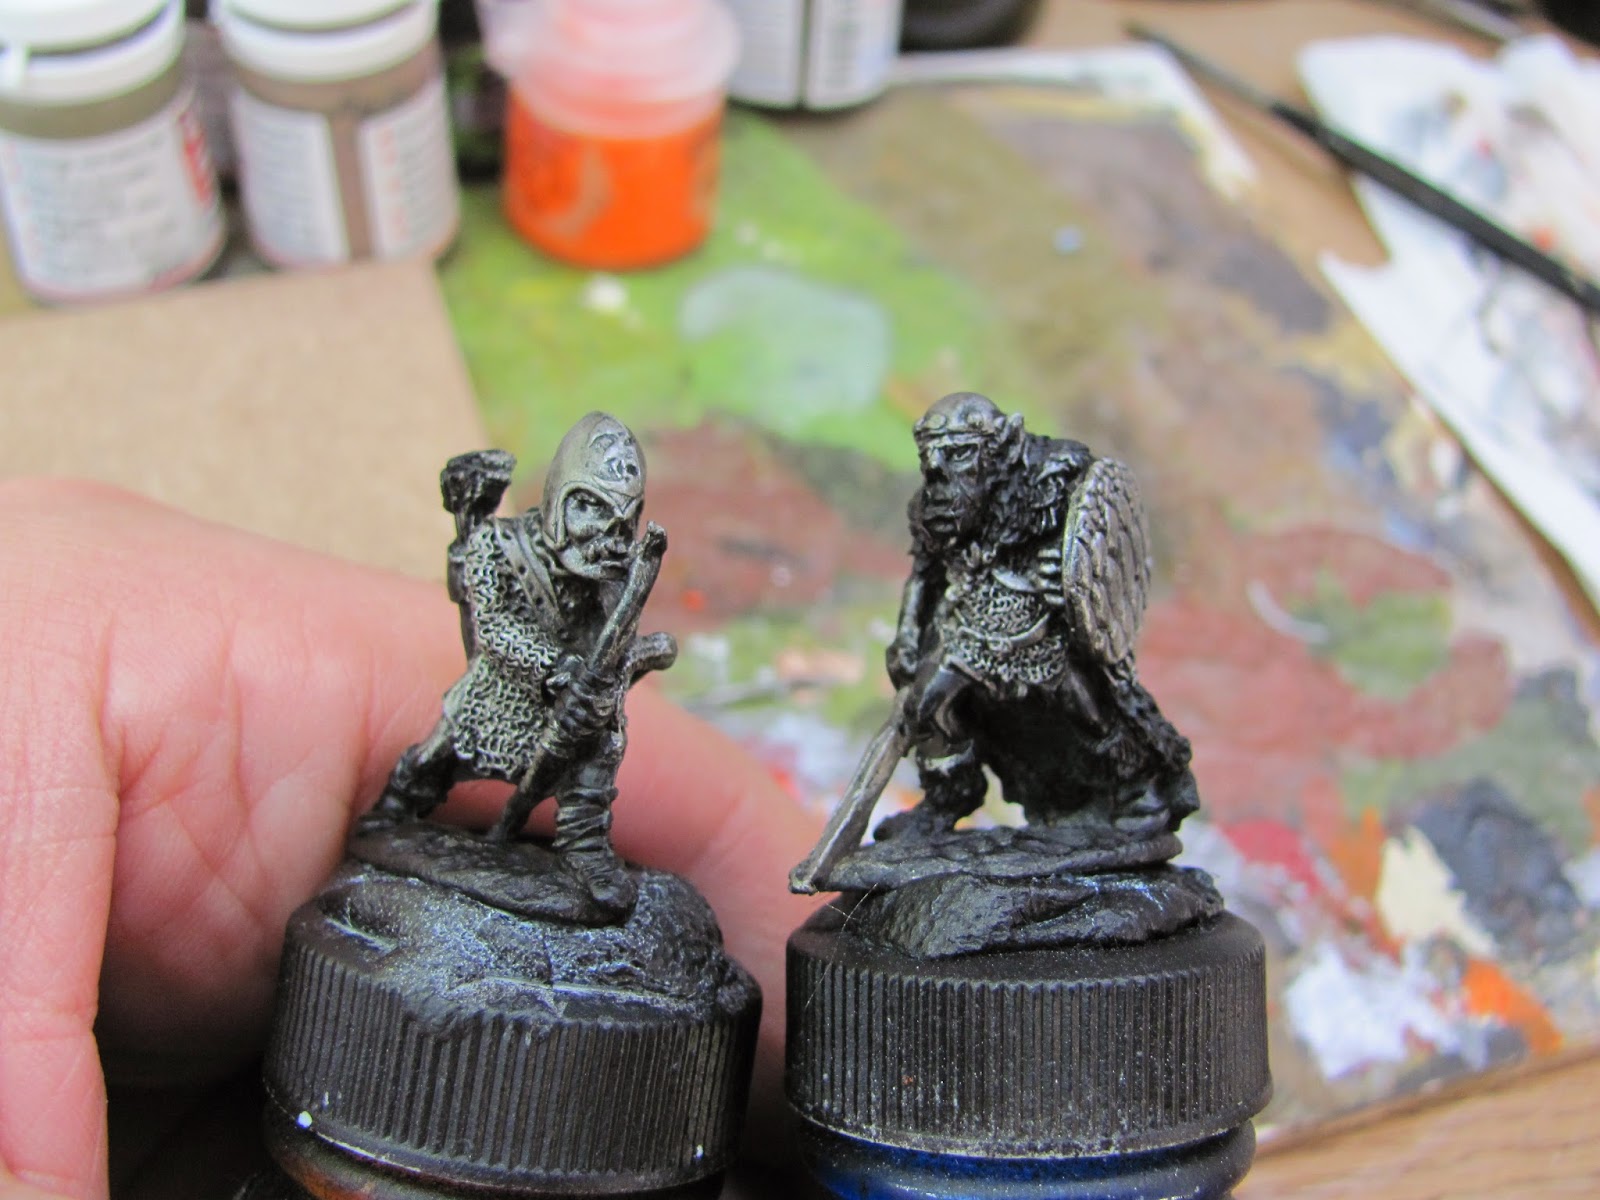
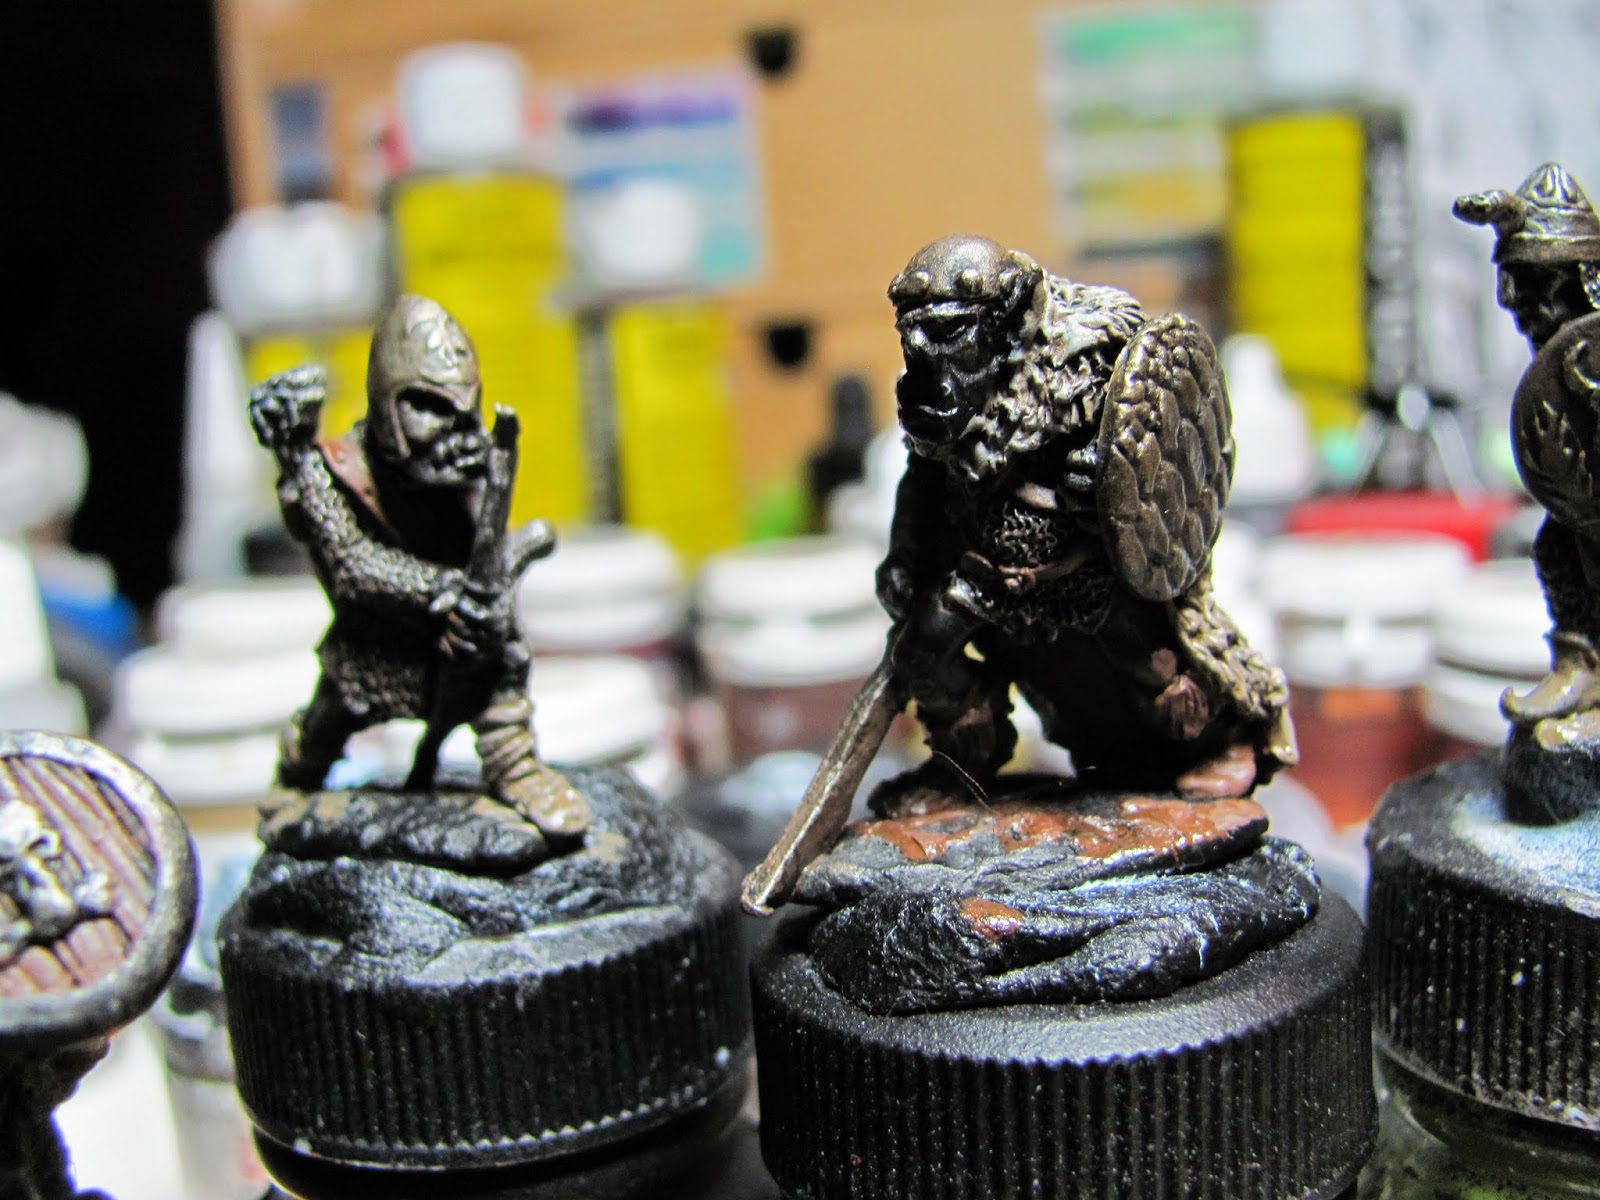
My first step is to undercoat them with Black from a spray can. I used Army Painter.
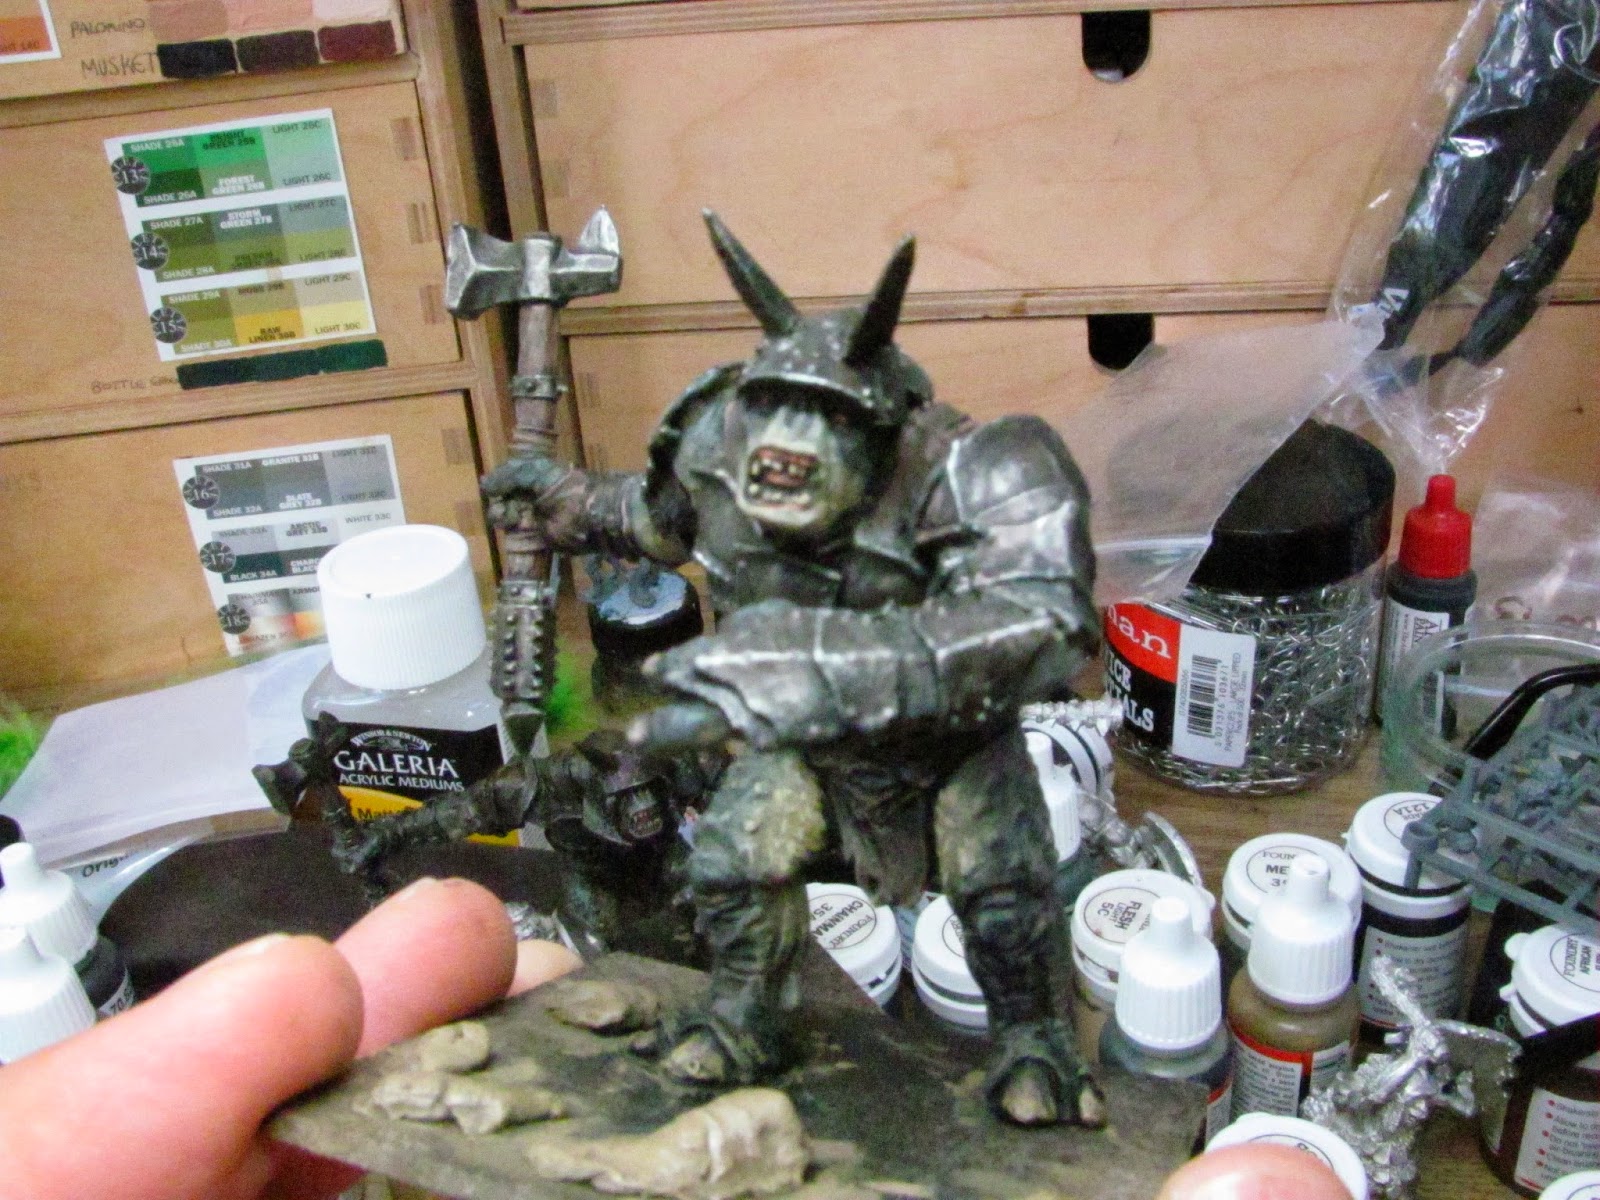
 My next step to to dry brush the metal work with Iron Breaker from GW. Having received the GW paint set for Christmas I were eager to use a lot of their colours to see what they were like.
 After the 'metalwork' was done I washed everything were Red Brown from Tamiya. I have tried many rust colours, some especially made for the job, but the Tamiya Red Brown comes up tops for me. A good coverage and just the right shade of colour for old rust.
The rest of the figure was quickly blocked in using simple browns, I wasn't too bothered about shading as this would come later with a wash of Woodland Scenics black.

Woodland Scenic Black is great and has a nice consistency to it that acts much like an Ink and leaves a nice finish.
 

 My approach to painting these orcs quickly is to bash through the armour and clothes but spend a little extra time on the flesh. Again I used simple browns and greys for the flesh colours.
 Here we see the Orcs with simple colours blocked in, to speed things along I try to use the same colours on multiple models.