

Saturday, May 15, 2010


Monday, May 10, 2010
Rebasing the 2nd Legere for 'Napoleon'
 The last of the Regiments finally gets based onto 40mm x 40mm bases. It worked out quite well with even a few left over to form the skirmish line.

The quick French Regiment test

 Not quite ready to leave the ranks of Napoleon yet, I thought I would do a test to dip a Line Regiment quickly. The troops have been sprayed in different base colours and this should make the whole process even quicker and take away the need for a lot of brush work.
Sunday, May 09, 2010
Private, 27th Regiment of foot

 Here you can see how black stain has shaded the red tunic. I think I have worked out my dip of choice for the rest of the Regiment.
Private dipped with black
 I think after seeing how this guy turned out I would have to vote the dark stain the winner between the two. I prefer the shading on the red and it has also done great things with the white and grey trousers. Again I retouched the red to see what it would look like when varnished, but I didn't really need to. It looked great as It was. Also the details on the front of the tunic came out good which i was surprised at, all colours considered, the black dip is the winner for me.
It would be interesting to test it on a French line Regiment with all its whites and blues.

 It's only when you look at the figures in macro you notice all the details you've missed and the mistakes. I will go back and paint all the buttons in and try to get the detail on the cuffs to match up. Macro can be a handy tool, once you done one right the others are easy.
I sadly pride myself now on being able to paint French line Infantry without research after painting so many. It has become a real joy to paint them and I don't what to leave them just yet. This is because I know that once I learn another uniform, I'll be off again for years, carried away with red coats and never look back. I think before I leave Napoleon's army I might just try dipping a marching unit of Line Infantry and of course finish those extra Artillery pieces. i hope my findings here are of use to anyone out there hoping to start dipping the dreaded Napoleonic era.
Napoleonic armies look very scary at first but If I can learn them, than any one can...and I mean that.
27th Foot Sargent
 Here are some more close ups of the Sargeant. you can see the brown of the mid tone on the close ups, it's works well with his white equipment.

hightlighted and matt varnished
 Tough Sarge is finally dry after a 24 hour wait and has been highlighted and varnished with matt spray varnish. To be honest he didn't really need any highlighting on him just a little tidying up around the belts. However I wanted to see how the base colours looked when retouched and varnished. A few finishing touches like the canteen/backpack details and now he's ready to go.
 I'm really pleased with the result and It's turned out better than I first imagined it would.
Saturday, May 08, 2010
27th (Inniskilling) foot

After a little further research I've found out that the 27th's cross belts were in fact buff. This is great as it will mark them out against the other Regiments and should lend Itself nicely to Army Painter.
Bottle Beggers

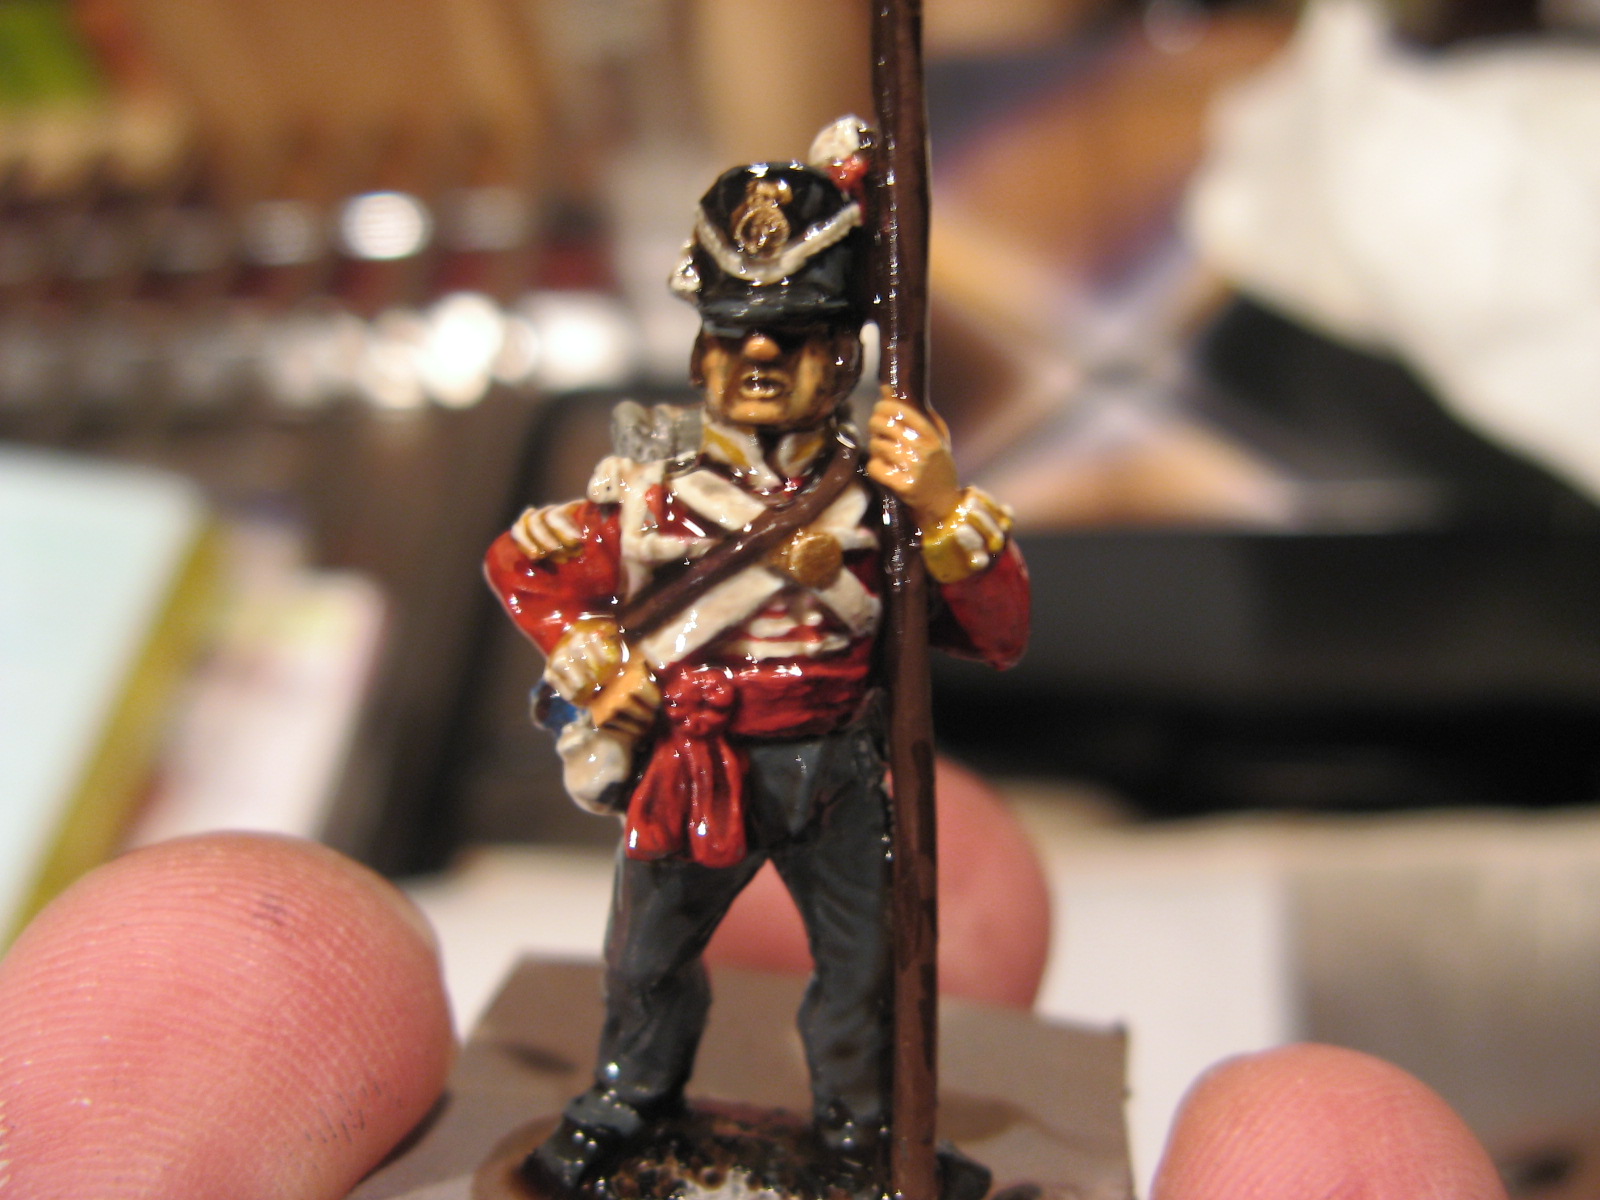 Here's a tough Sargent from the renown 27th Regiment of foot, better known as the Inniskillings.
Once more into the dip


 Tough sarge has been dipped in the mid tone (brown) hence the black wash on his face before the plunge. The centre company man has been dipped in the strong tone (black). I am surprised how good the black is working with all the white belts and red areas. Most war games figures are painted to be viewed at about two or three feet distance and the stronger contrast with the black just might swing it.
The mid tone on Sarge is doing great things to the white equipment like the bread bag, we'll have to wait the mind numbing 24 hours drying time and have another look.
Dip Test # 2
 Here are two likely looking lads from Wellington's infamous army. Again the plan is to dip one in strong tone (black) and one in mid tone (brown) from Army Painter. I think with army painter the trick is to put the time in before the model is dipped, therefore I have added a few highlights on the black equipment. Black is really tricky to highlight afterwards and I think it's easier to do before the dipping process. I've also given the faces a quick wash of black to bring out the details and that goes for the sash as well. Hopefully if all goes to plan I won't have to do any highlights after the model is dipped. Well, maybe just a few...I probably won't be able to help myself.

To help speed up the painting production line, I always try to source the right colours straight from the pot, this is easier said than done. For example I found the perfect dark grey from Tamiya. All the other colours are from the Foundry paint system and are the 'B' pot in each colour. Foundry do a fantastic Napoleonic colour range amongst others which does save hours of sourcing and mixing...recommended.
Wednesday, May 05, 2010
Scary extreme close up
 Two extreme close ups of the finished models. This is as close as I could go with my now out of date camera. This model is the brown stained model, Army Painters medium tone. The white close belts came out nicely with this stain and It's probably the one I would recommend for most Napoleonic armies.
 Next the ones I have been waiting for...the good old British red coats...bless em.
Matt varnished
 Matt varnished at last after a life time of waiting. The choices between the two different stains for me are minimal. It was a good experiment to do, but it's what I suspected from the begining.
Artillerymen and Legere units would benefit from the dark (black stain) better as with their dark blue uniforms a dark shading tone is needed. However, I would say that troops with white breeches and lighter colours would warrant the dark brown dip. I have a feeling with their red coats and white cross belts, the British Line regiments would look better dipped with medium tone brown. French Line units with their white breeches and cross belts, yellow and red elite companies and flesh tones may also take to the brown stain better.

 Who stuck that hair on there?...well what kind of hair is it? Oh thank god for that...Well who let the bloody thing in...Hargreaves get in here!!!!
Highlighting the dip
 It was weird painting on to gloss varnish but the dip did make for a nice smooth surface on which to paint. I had thought of Matt varnishing first so I could see the colours better, but in the end followed the advice of Saxon Dog and painted straight onto the dried shiny surface.
 I highlighted with the same base colours again. It was a lot of fun doing this and was a nice mix of dipping and layering.
Black and brown dipped French blue

 Here they are after their dips, I have to say that at this stage all figures look scary. The first is dipped in Army painter dark tone (black) and the second in the medium tone (brown to you and me), I used to be put off at first during this glossy stage but stay with it, the matt varnish is the key. Waiting the 24 hours can be a drag but it has to be done. In the past I had felt the model every hour to see if it's dry, then carried on to varnish it before ready. This just causes cracking on the models surface.
I put the drying models out of the way now in the shed, out of sight out of mind...it works.
Monday, May 03, 2010
General of Division
 This Command base was a lot quicker to paint the second time around. I used the first base as the painting ref which saved a lot of page turning. I thought I would give this Aide a nice pair of red breeches to mark him apart from his clone on the first base.
 Two bases down... one more Divisional General to go and then the Marshal himself.
French top brass
 While I wait the 24 hours for the dip to dry, I took the chance to finish off another French command base. Another General of a division and his trusty aide. Riding back and forth across the battlefield, dodging shot and shell his aide has become rather dirty, but war is a messy business.

Base coat colours
 Here's our man with his base colours finished. His coat and trousers are Foundry's French blue 'B' and the red is Foundry's Scarlet 'C'. The flesh is Flesh tone 'B' also from the Foundry range.
 I have given the chin strap a quick wash of watered down black just to bring out the detail and also highlighted the black shako etc before dipping. I find this really helps and any detail you are afraid of losing, always 'wash' first. I found that giving the face a quick wash with black before dipping really helped to bring out the features better when using the brown stain. I think with Napoleonic soldiers who are thought of as being the quintessential gaming pieces, these little touches are important. If I can get my Naps to a certain standard using Army Painter I will be happy. At the moment I'm still 50/50 so these tests are worth doing.
Undercoat
 Here he is, the first brave volunteer to step forward and take the plunge. I have undercoated him with grey primer from Halfords and quickly dry brushed his white cross belts. The main reason for using Army Painter is to speed up the production line and still get good results, so I have tried to find quick ways of working. This should allow me to complete a unit in a weekend. Although It has to be said the worst thing about AP is the 24 hours wait in which the stain takes to dry. Painting a small unit of Artillery men with AP seems a little daft for in 24 hours the whole lot could be done seven times over. However I'm looking at the bigger picture of cracking through British Line Regiments.
Using Army Painter on Naps.
 Happy with my dipped Celts I thought I would move onto dipping Napoleonics. This is something I would never have imagined myself saying a year back, but impressed by the work of Saxon Dog amongst others, I thought I would give It a go.
I even saw an article in War games Illustrated showing a unit of British red coats, dipped using the darkest tone which is basically black. So after all this positive evidence I thought I would go for it. The next question is though which stain is best suited for which army and what will the dark brown stain look like on grey trousers etc. The only way to find out was to do a little testing first. I plan to do a couple of small tests before launching a full assault. The first will be a French Artilleryman in his dark blue uniform, the other a Brit in his red uniform.
Subscribe to:
Posts (Atom)